Workspace & API Keys
Workspace settings live under Settings in the console. This is where you invite teammates, manage their roles, rotate API keys, and configure billing.
API Keys
Every server-side integration with qbrix uses an API key. Keys are scoped to a workspace and start with the optiq_ prefix.
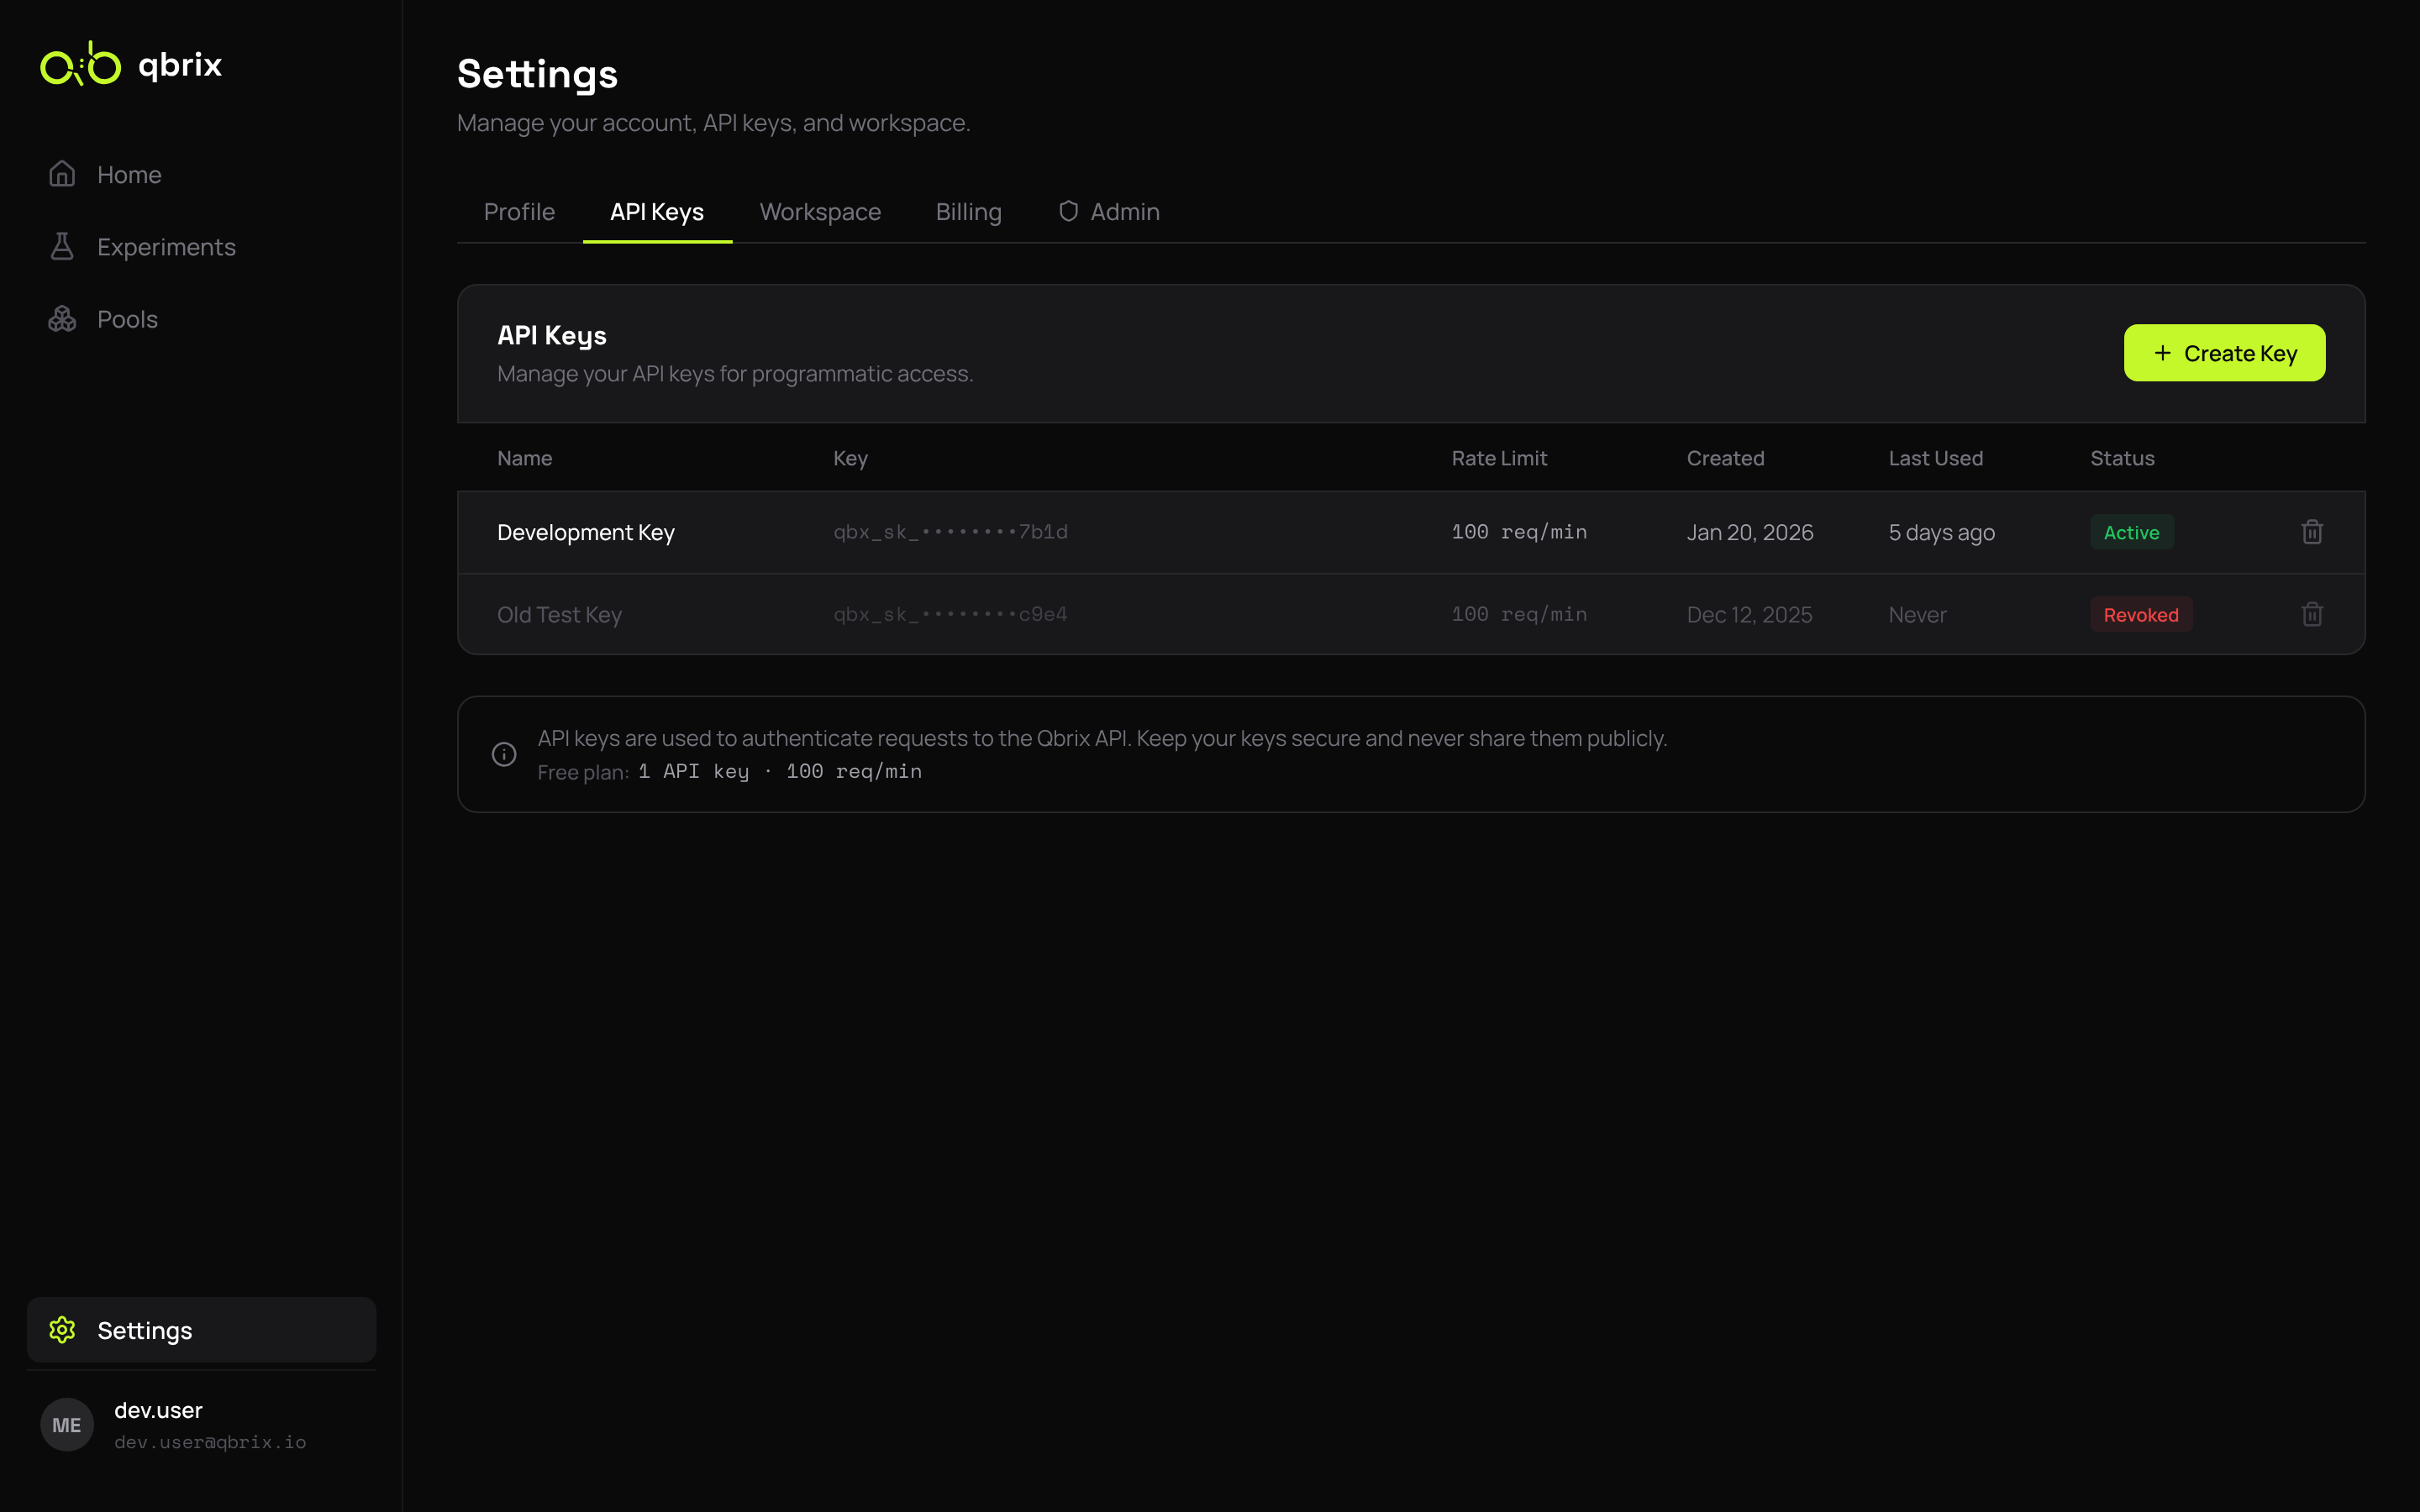
Creating a Key
- Settings → API Keys → Create API Key
- Give it a recognizable name (e.g.
prod-checkout-service). - Copy the generated key immediately — qbrix only shows it once.
API keys inherit the role of the user that created them. Use a viewer key for read-only integrations and a member key for services that need to write feedback or create experiments.
Rotating a Key
Click the rotate icon next to a key to generate a fresh secret. The old secret stops working immediately, so coordinate the rotation with your deployment.
Revoking a Key
Use the trash icon to permanently delete a key. There is no undo.
Members & Invites
The Workspace tab lists every member, their role, and the date they joined.
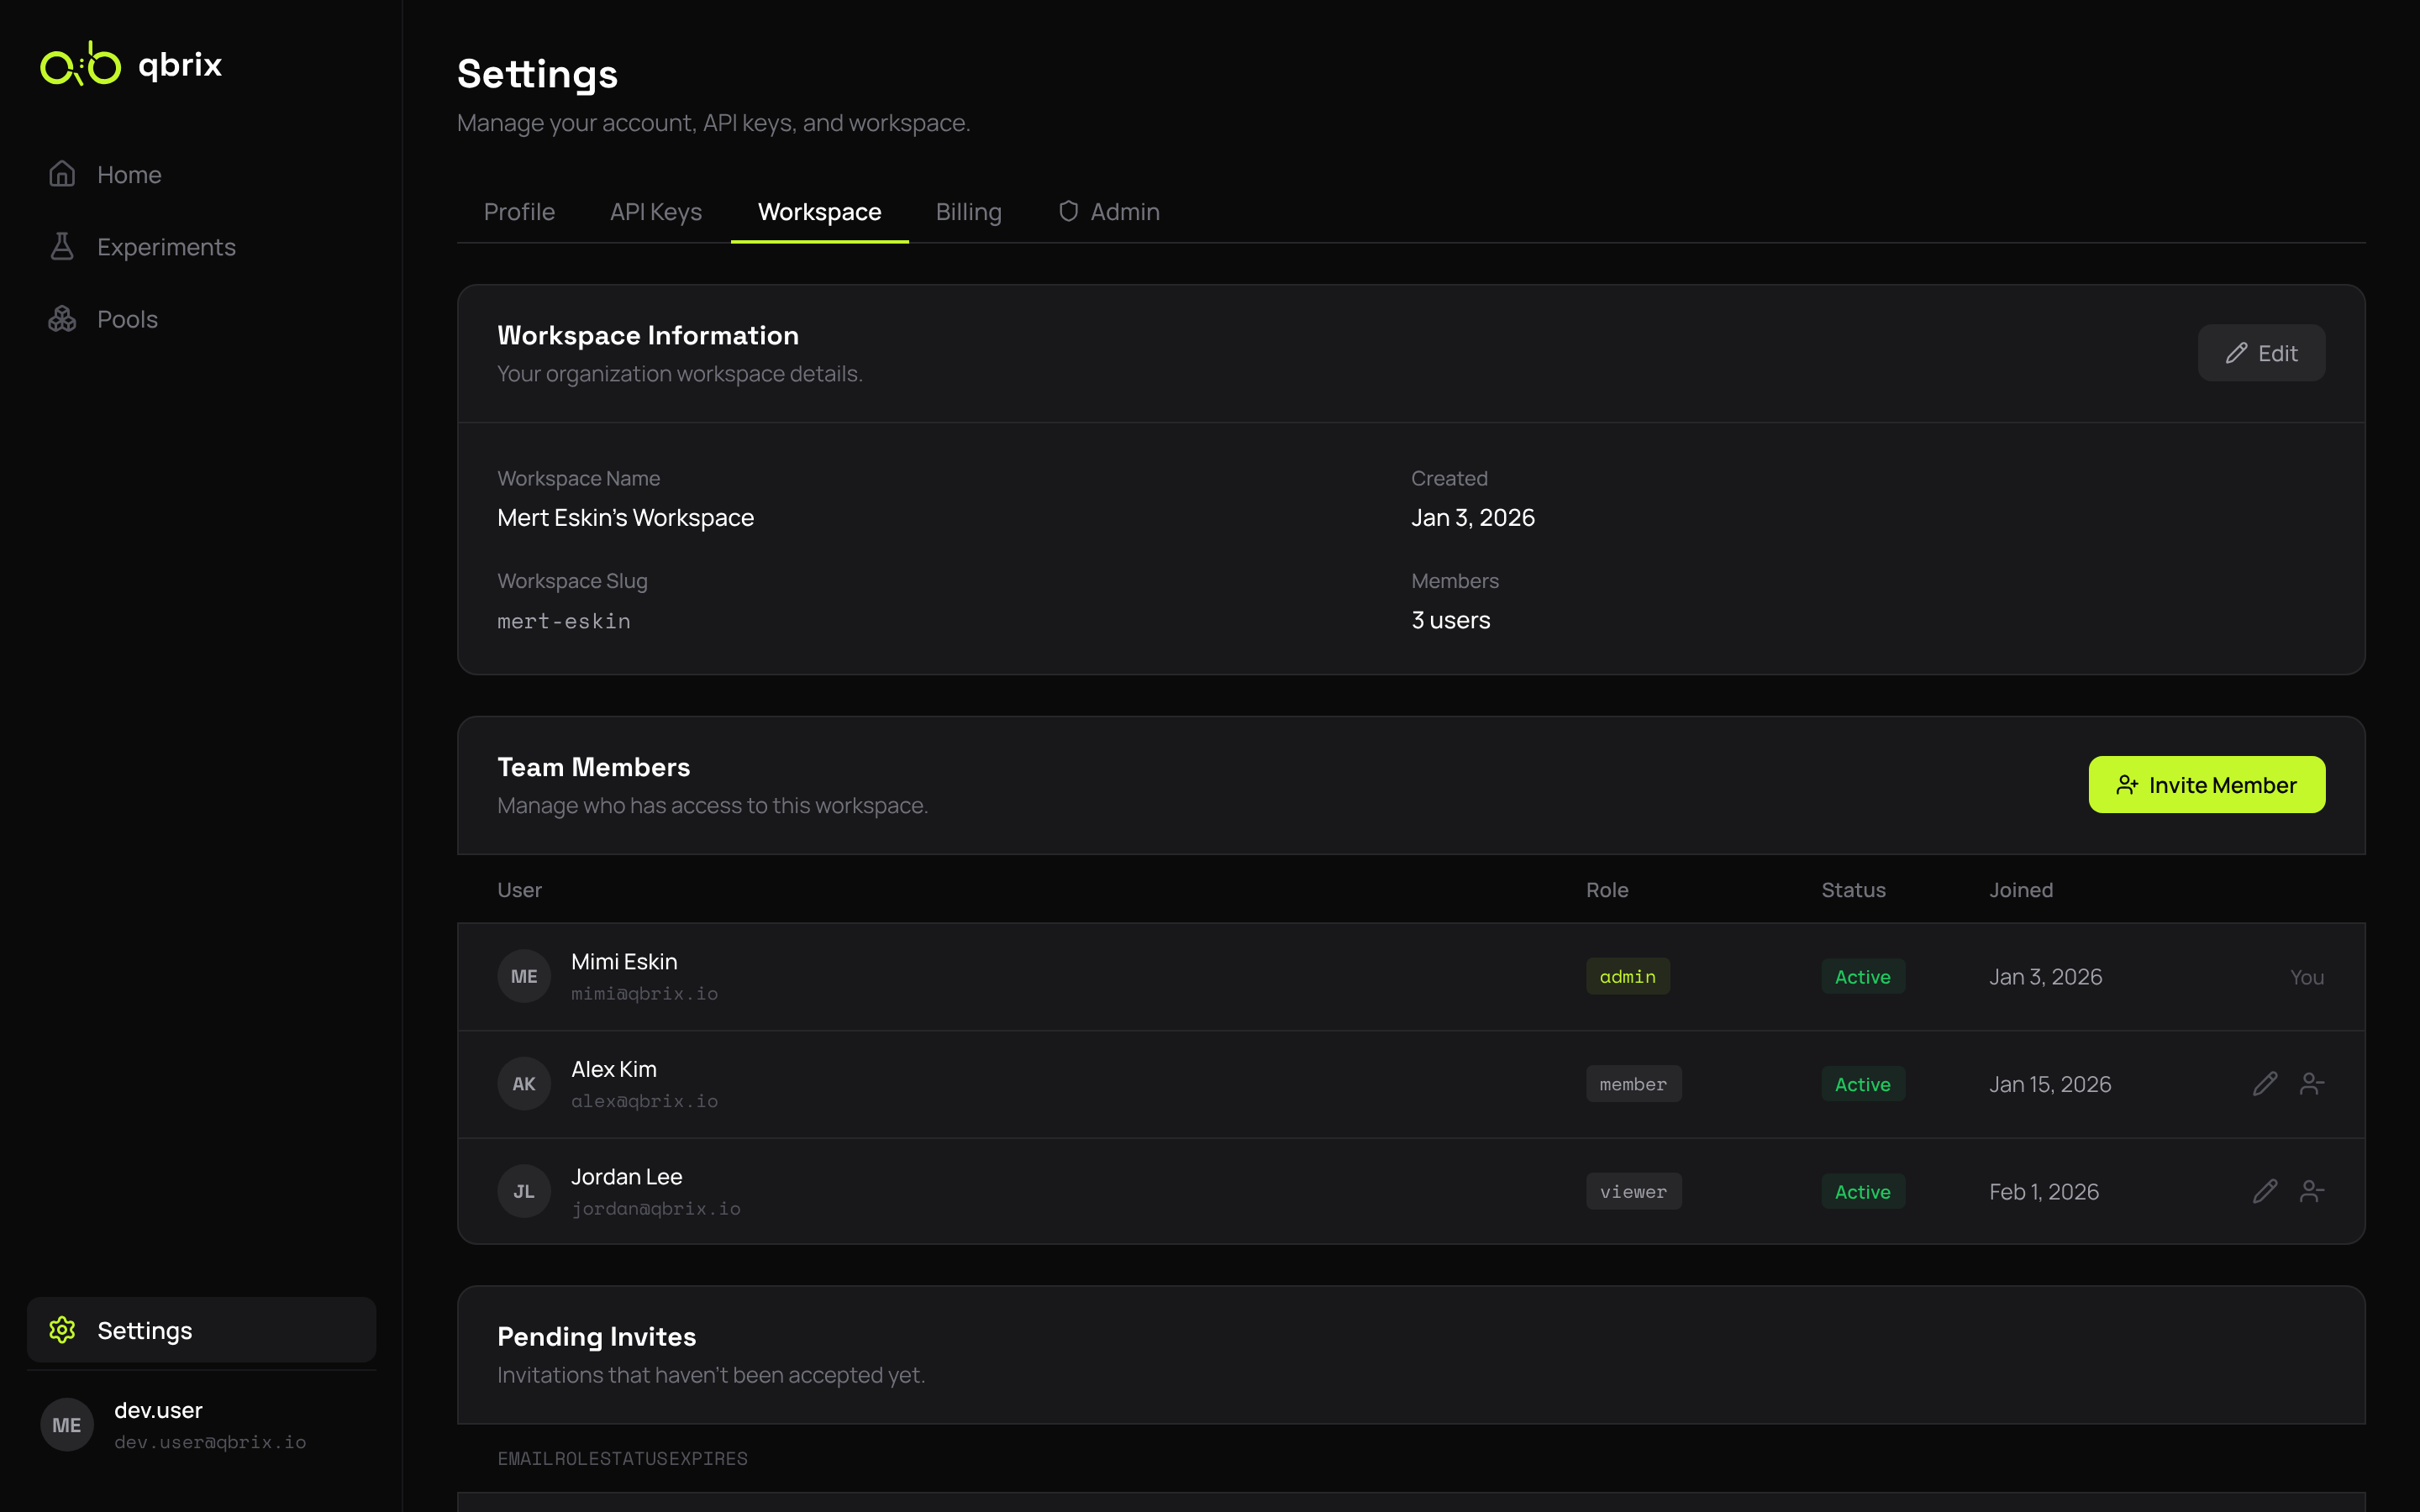
Inviting a Teammate
- Click Invite Member.
- Enter the email and choose a role.
- The invitee gets an email with a one-time link that expires in 7 days.
Pending invites show up in the same table with a Pending status. You can resend or revoke them at any time.
Roles
| Role | What they can do |
|---|---|
| admin | Everything: experiments, gates, members, billing, API keys |
| member | Experiments, pools, gates, agents, insights — but not workspace or billing |
| viewer | Read-only across all resources |
Roles are enforced server-side by RBAC scopes — the console just hides controls the user can't use. See the API Reference for the full scope list.
Plan & Billing
EnterpriseThe Billing tab (admin-only) shows your current plan, usage against limits, and the next invoice date.
| Tier | RPM | API Keys | Seats | Active Experiments |
|---|---|---|---|---|
| free | 100 | 2 | 5 | 3 |
| starter | 1,000 | 5 | 15 | 15 |
| pro | 10,000 | 25 | unlimited | unlimited |
| enterprise | unlimited | unlimited | unlimited | unlimited |
RPM limits apply only to the operational endpoints (/agent/select and /agent/feedback). Management endpoints are not rate-limited.
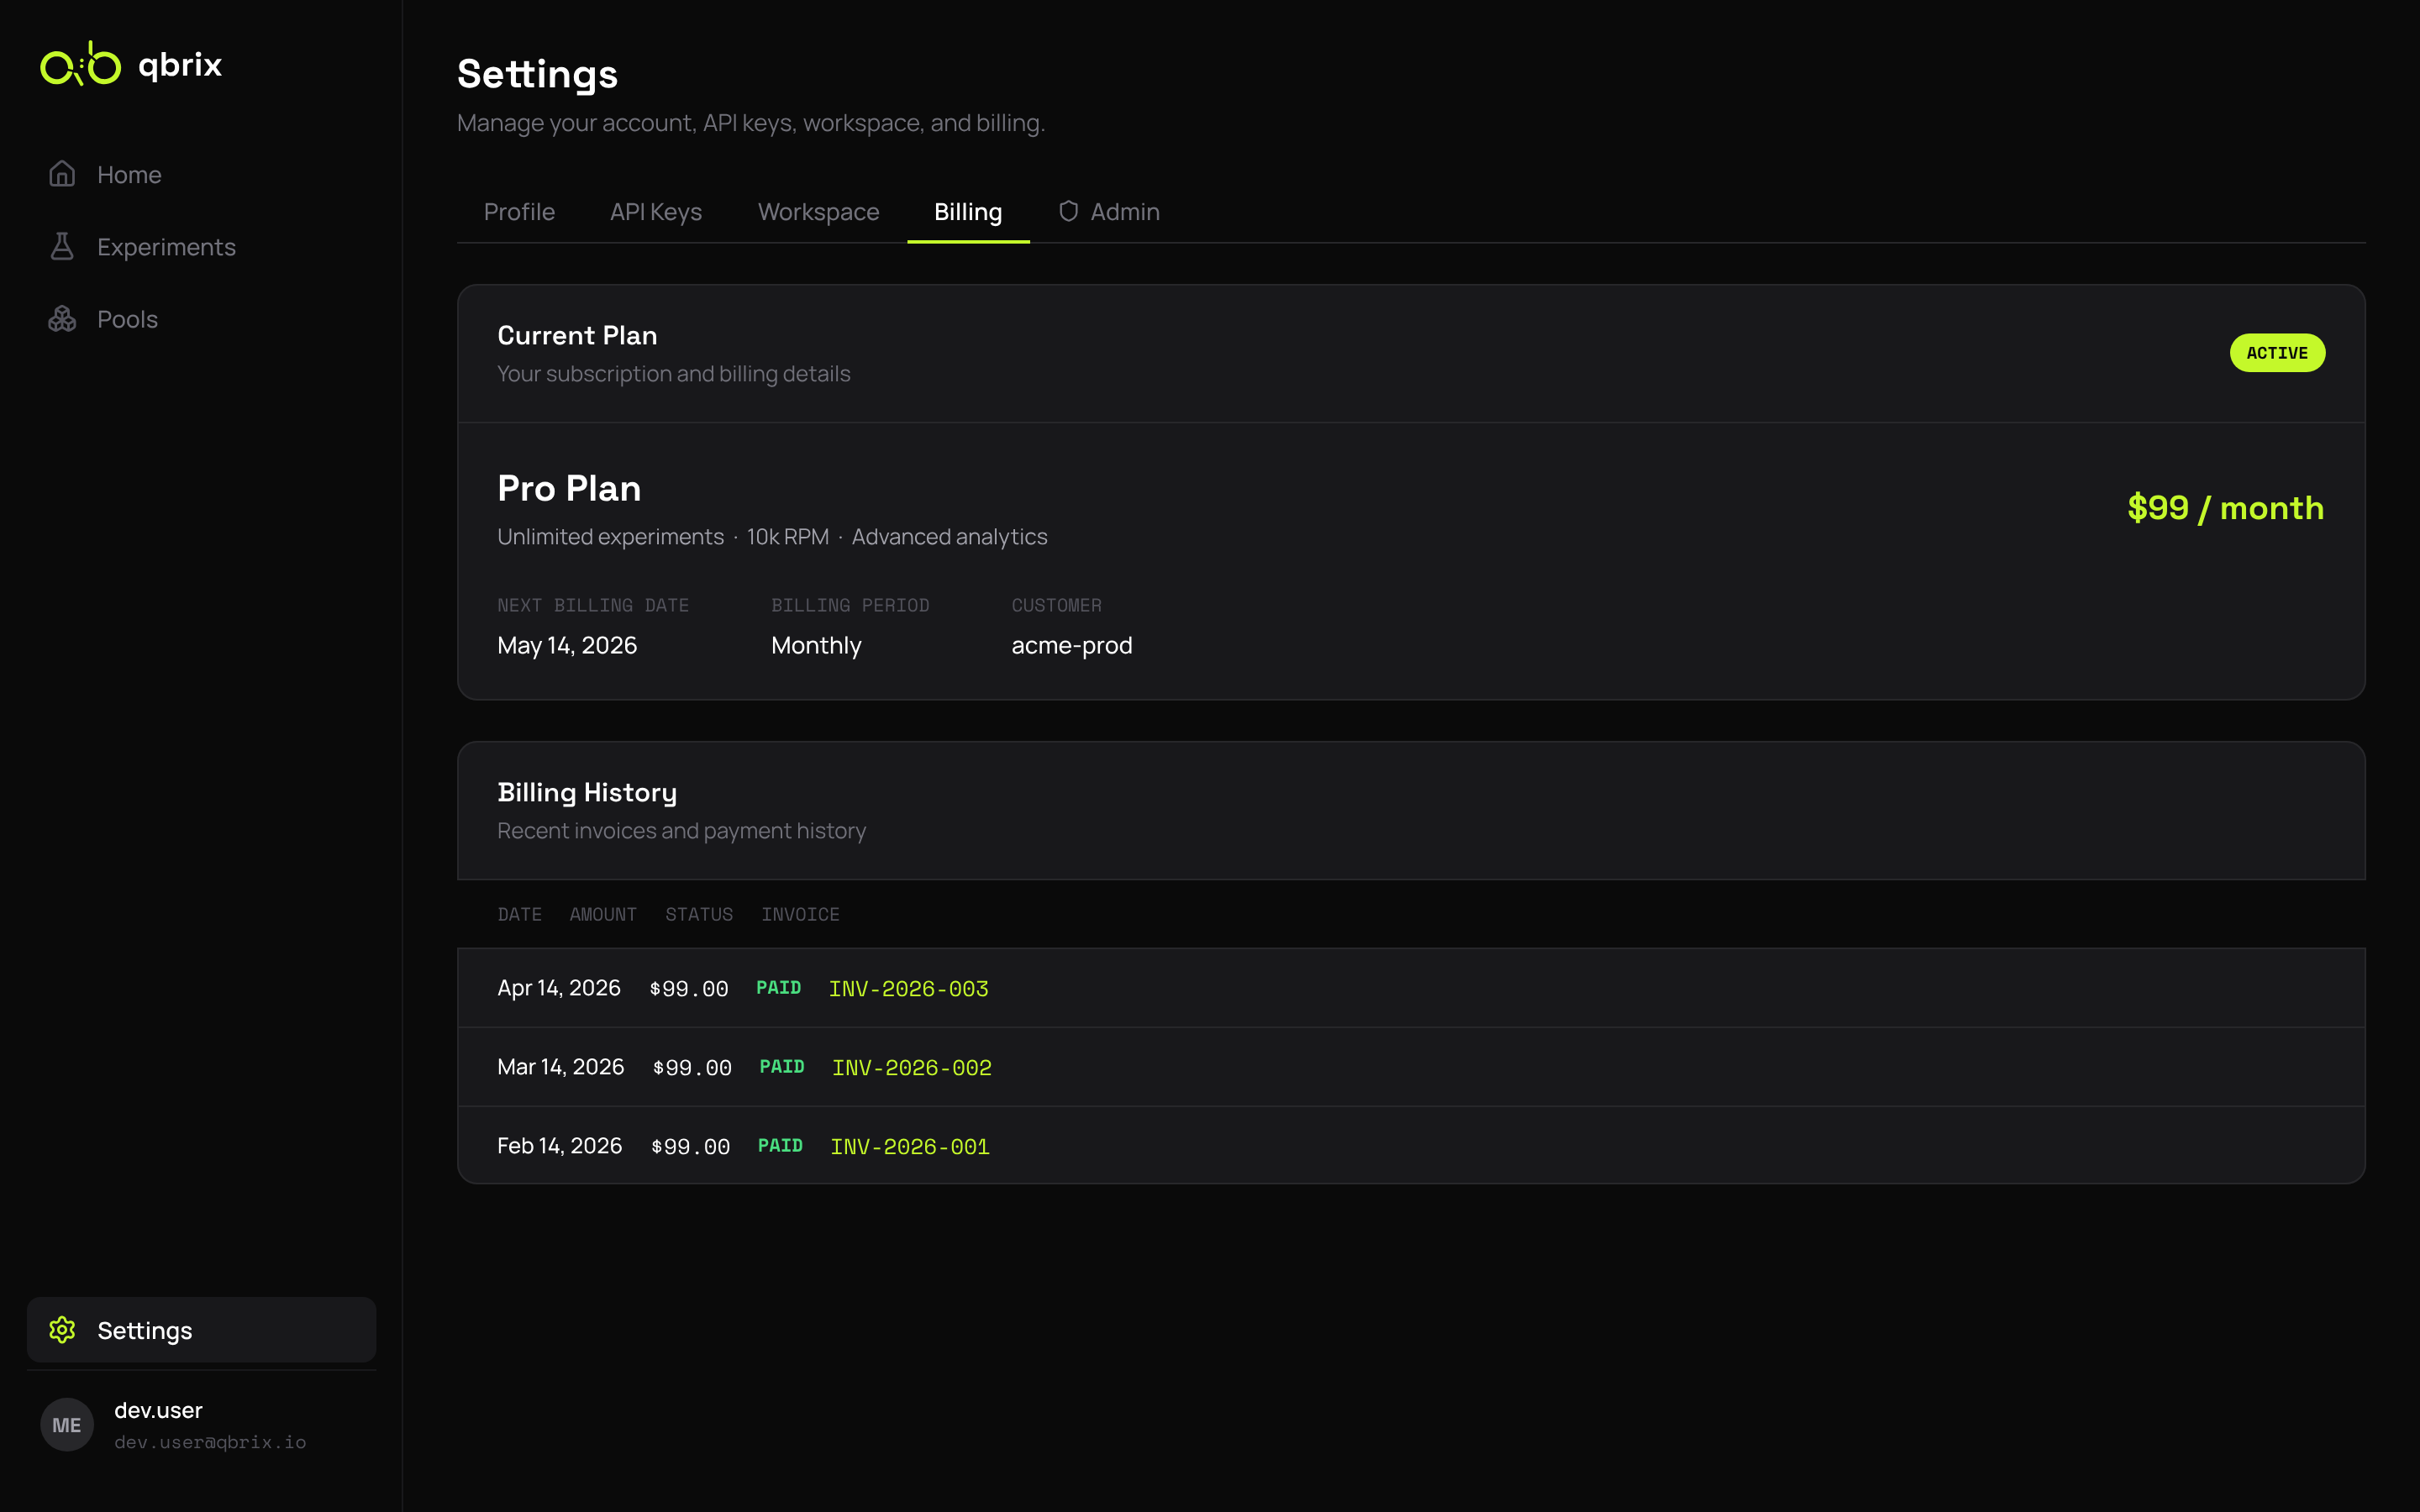
Upgrading
Click Upgrade Plan to launch the Stripe checkout flow. Plans take effect immediately on a successful payment.
Invoices
All invoices are downloadable as PDF from the Invoices subsection. Failed payments trigger an in-app banner and an email to the workspace admin.
Profile
The Profile tab lets each user update their display name, email, and password. Email changes require re-verification.
Next Steps
- Console Experiments — get back to the bandits
- SDKs — wire up your new API key